Your best friend for file transfer.
 Fetch
Fetch
 Fetch Help > Preferences > WebView
The WebView Preferences pane lists the WebView entries you have created, and lets you add, delete, or edit them.
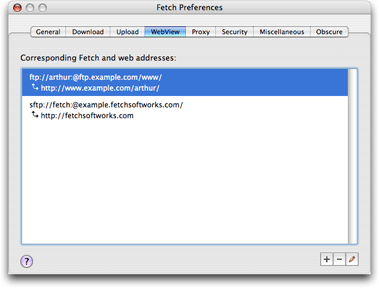
Each WebView entry specifies a correspondence between a Fetch address and a web addresses. Usually there will be one entry for each server you use. For each entry, the Fetch address is listed first (usually starting with ftp, ftps, or sftp), followed by its corresponding web address (usually starting with http or https). The addresses are displayed as URLs (Uniform Resource Locators).
To add a new WebView entry, click the Add (+) button. The WebView dialog will be displayed, prompting you to enter or choose a Fetch address and web address.
An easier way to create WebView entries is to connect to your file server, and then click the WebView button in the toolbar. Fetch will display a version of the WebView dialog that prompts you for just the web address, since it can get the Fetch address of your server from the connection.
To delete a WebView entry, select an entry and click the Delete (-) button, or press the Delete key. WARNING: Deleting an entry is not undoable.
To change or edit a WebView entry, select an entry and click the Edit (![]() ) button or press the Return key, or double-click on an entry. The WebView dialog will be displayed, and you can change the Fetch address or the web address.
) button or press the Return key, or double-click on an entry. The WebView dialog will be displayed, and you can change the Fetch address or the web address.
See the WebView topic for more information about WebView.
Related topics: