Your best friend for file transfer.
 Fetch
Fetch
 Fetch Help > Fetch Tutorial > Connecting
When you first start Fetch, the New Connection dialog appears. You can choose New Connection from the File menu to display the dialog at other times.
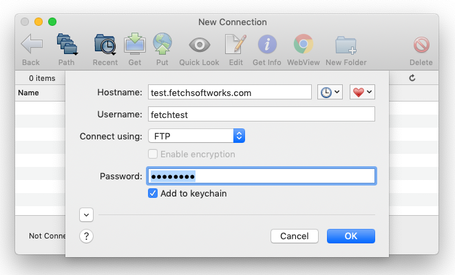
The New Connection dialog has fields for entering the following pieces of information:
- Hostname: the name of the server you want to transfer files from or to
- Username: the name of your account on that server
- Connect using: how you're going to connect to the server (usually FTP or SFTP)
- Password: the password for your account
Usually you'll be entering information about an account you have with a service provider, such as your Internet service provider or a web hosting service. You get the hostname, username and password from that service provider. Fetch Softworks is not a service provider. For more information, see the What do I enter in the hostname, username, and password fields? topic. After you enter the information, you can save it in a shortcut so that you don't have to type it again in the future.
The New Connection dialog also has two ways to quickly fill out some or all of these fields. To the right of the Hostname field, there are two pop-up menus — the Recent Connections ![]() pop-up menu and the Shortcuts
pop-up menu and the Shortcuts ![]() pop-up menu . The Recent Connections pop-up lists the last 10 connections you've made, whereas the Shortcuts menu list shortcuts to servers (similar to bookmarks in web browsers). The example below shows how to connect and create your own shortcuts.
pop-up menu . The Recent Connections pop-up lists the last 10 connections you've made, whereas the Shortcuts menu list shortcuts to servers (similar to bookmarks in web browsers). The example below shows how to connect and create your own shortcuts.
Example:
Choose New Connection from the File menu to display the New Connection dialog, if it's not already displayed.
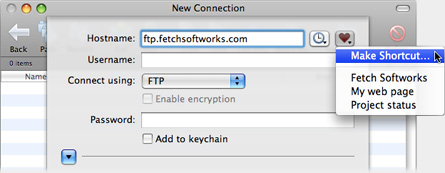
In the Hostname field, type "ftp.fetchsoftworks.com" (without the quotes).
Normally you would also type your account's username and password into their respective fields, but for this example you are using what's called "anonymous" FTP — you are connecting to ftp.fetchsoftworks.com as a guest with limited ability to make changes. No username or password is required for anonymous FTP.
Click the Shortcuts ![]() pop-up menu, and choose Make Shortcut.
pop-up menu, and choose Make Shortcut.
The Make Shortcut dialog appears.
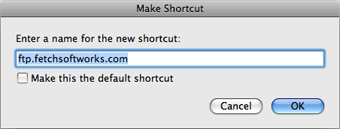
You can either keep the suggested name, or enter a new one, such as "Tutorial Shortcut." If you wanted Fetch to always start with the information in this shortcut, you would check the Make this the default shortcut box. You probably don't want to make this tutorial shortcut the default, though, so don't check the box this time. Click the OK button to confirm the shortcut name.
Finally, click the Connect button to open the connection. The Fetch transfer window and file list will appear, and the shortcut will be saved for future use.
You do not have to make a shortcut each time you make a connection — usually you only make one if you think you will be connecting to the same server repeatedly.
When you want to make a connection, follow the steps in the example, but type in the information for your account and Internet provider instead, including your username and password. Whenever you want to use a shortcut you've created, choose it from the Shortcuts ![]() pop-up menu in the New Connection dialog, or from the Shortcuts menu.
pop-up menu in the New Connection dialog, or from the Shortcuts menu.
For more information about the New Connection dialog, see the introductory or in-depth help topics about it.